You can get your YouTube channel viewers to subscribe instantly by creating a link that automatically subscribes them. It might sound tricky but it’s not hard to do, and the benefits are worth it.
Here’s how to make a link to subscribe automatically to your YouTube channel:
Go to your YouTube channel and locate the channel URL in the URL bar of your browser. Your channel URL may say /channel/ or /user/ depending on when it was created, don’t worry about it they will both work.

Then, you’ll paste this URL modifier at the end of your channel name:
?sub_confirmation=1It’s gonna end up looking like this:

Then, just copy and paste this URL and use it wherever you want to put a link to have people automatically subscribe to your YouTube channel, just like you would use any other link.
I like to add this link to my YouTube video descriptions, to my blog, and anywhere that I post or embed my YouTube videos.
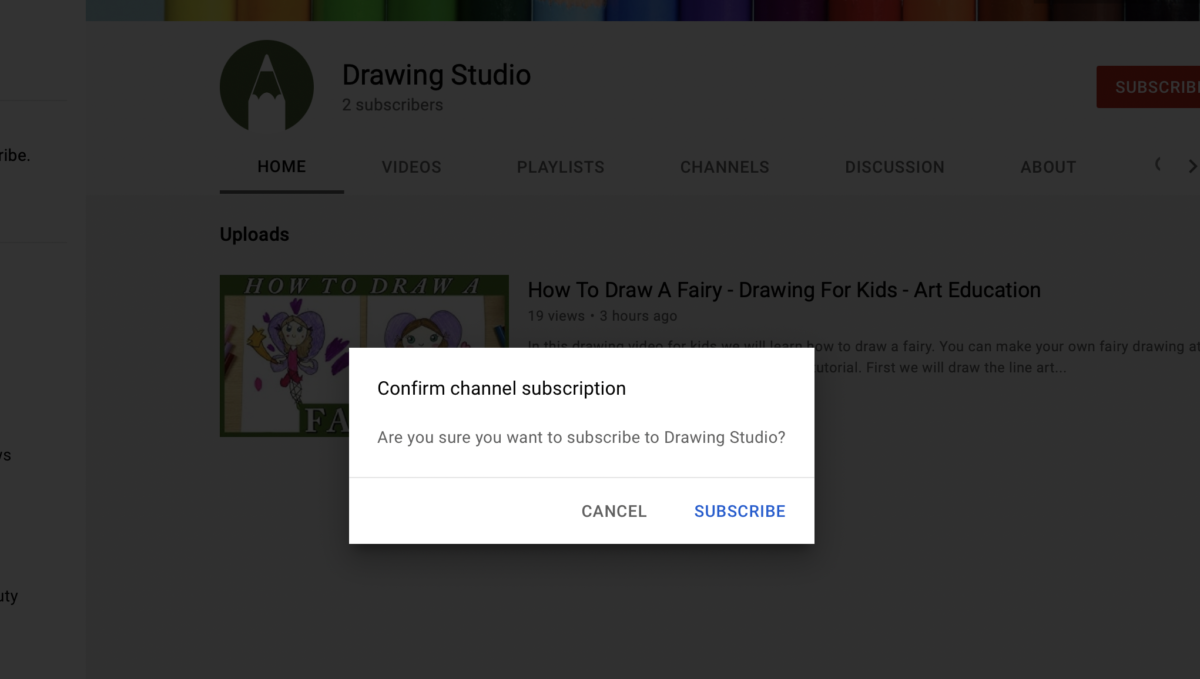
So what happens if you go to the link? Go ahead and try it.
You’ll get redirected to your channel’s homepage and a modal box will appear asking you to confirm that you want to subscribe. It makes it really quick and easy for folks to subscribe if they like your stuff.
Tracking your link
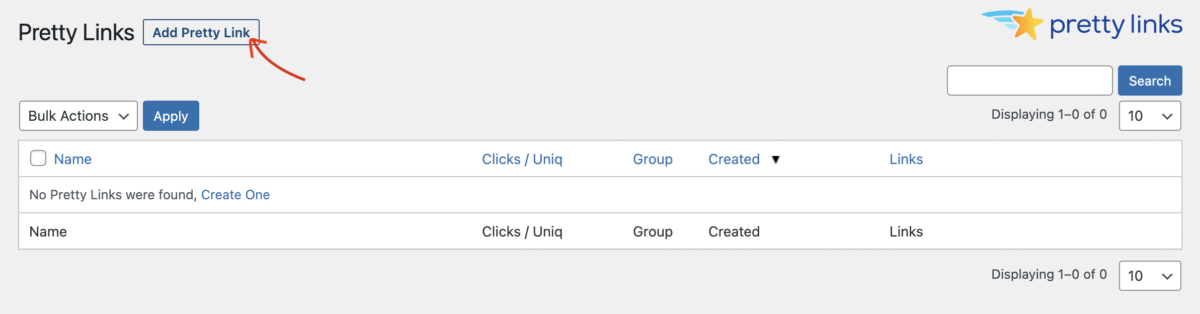
I recommend tracking your subscription link so that you can see how many times people actually click on it. You can use a service such as bit.ly or use a free WordPress plugin that can handle URL redirection and link tracking such as Pretty Links.
Once you install Pretty Links, click the button near the top that says “Add Pretty Link“:
On the next screen you’ll need to add in your link information.
For Redirection, choose 301 (Permanent).
For Target URL, paste your YouTube channel subscribe link with the modified URL ending in ?sub_confirmation=1 as shown below.
In the Pretty Link field, you can have it say whatever you want. It’s a best-practice to make the URL wording descriptive of what the link is going to lead to. I think “subscribe” or “YouTube-subscribe” or something along those lines will suffice.
The Title field is optional – it will appear as the title of this link in the backend of your Pretty Links dashboard and make it easier to identify your link. I recommend giving it a descriptive title that will make it easy to understand later when you’ve forgotten that you set this up!
You can add a Group to organize your links in (this is just for your own admin purposes and I do recommend grouping your links if you plan to use pretty links for affiliate link tracking also).
For No Follow, I recommend leaving it ticked because the destination URL is the screen with the confirmation to subscribe.
Lastly, be sure that the box for Tracking is ticked. If it’s not ticked, it’s not gonna get tracked!
Here’s what it will look like once it’s all filled out:
Then press the Create button and your link is ready.
It’ll take you back to the screen where you can see all the Pretty Links you’ve made. Click on the little clipboard icon to copy your shortened pretty link to the clipboard, then you can paste it anywhere!
Be sure to always test that your links work correctly once you put them anywhere. Also make sure that they are getting tracked (where it says Clicks / Uniq in the table as you can see below):
I hope you found this little tutorial on adding an auto-subscribe link for your YouTube channel useful. If you have any questions you can post them in the comments of this page.
Remember, only post this link in places where it makes sense and never use it to try to trick people into subscribing. Happy linking!